Connector Quick Start
Start Connector
Unpack the distribution and run the start script located in the installation bin directory.
LINUX
./connector
WINDOWS
./connetor.bat
Login to Connector
Once the Connector has started, navigate to the Admin UI and login with the default username and password, admin/admin:
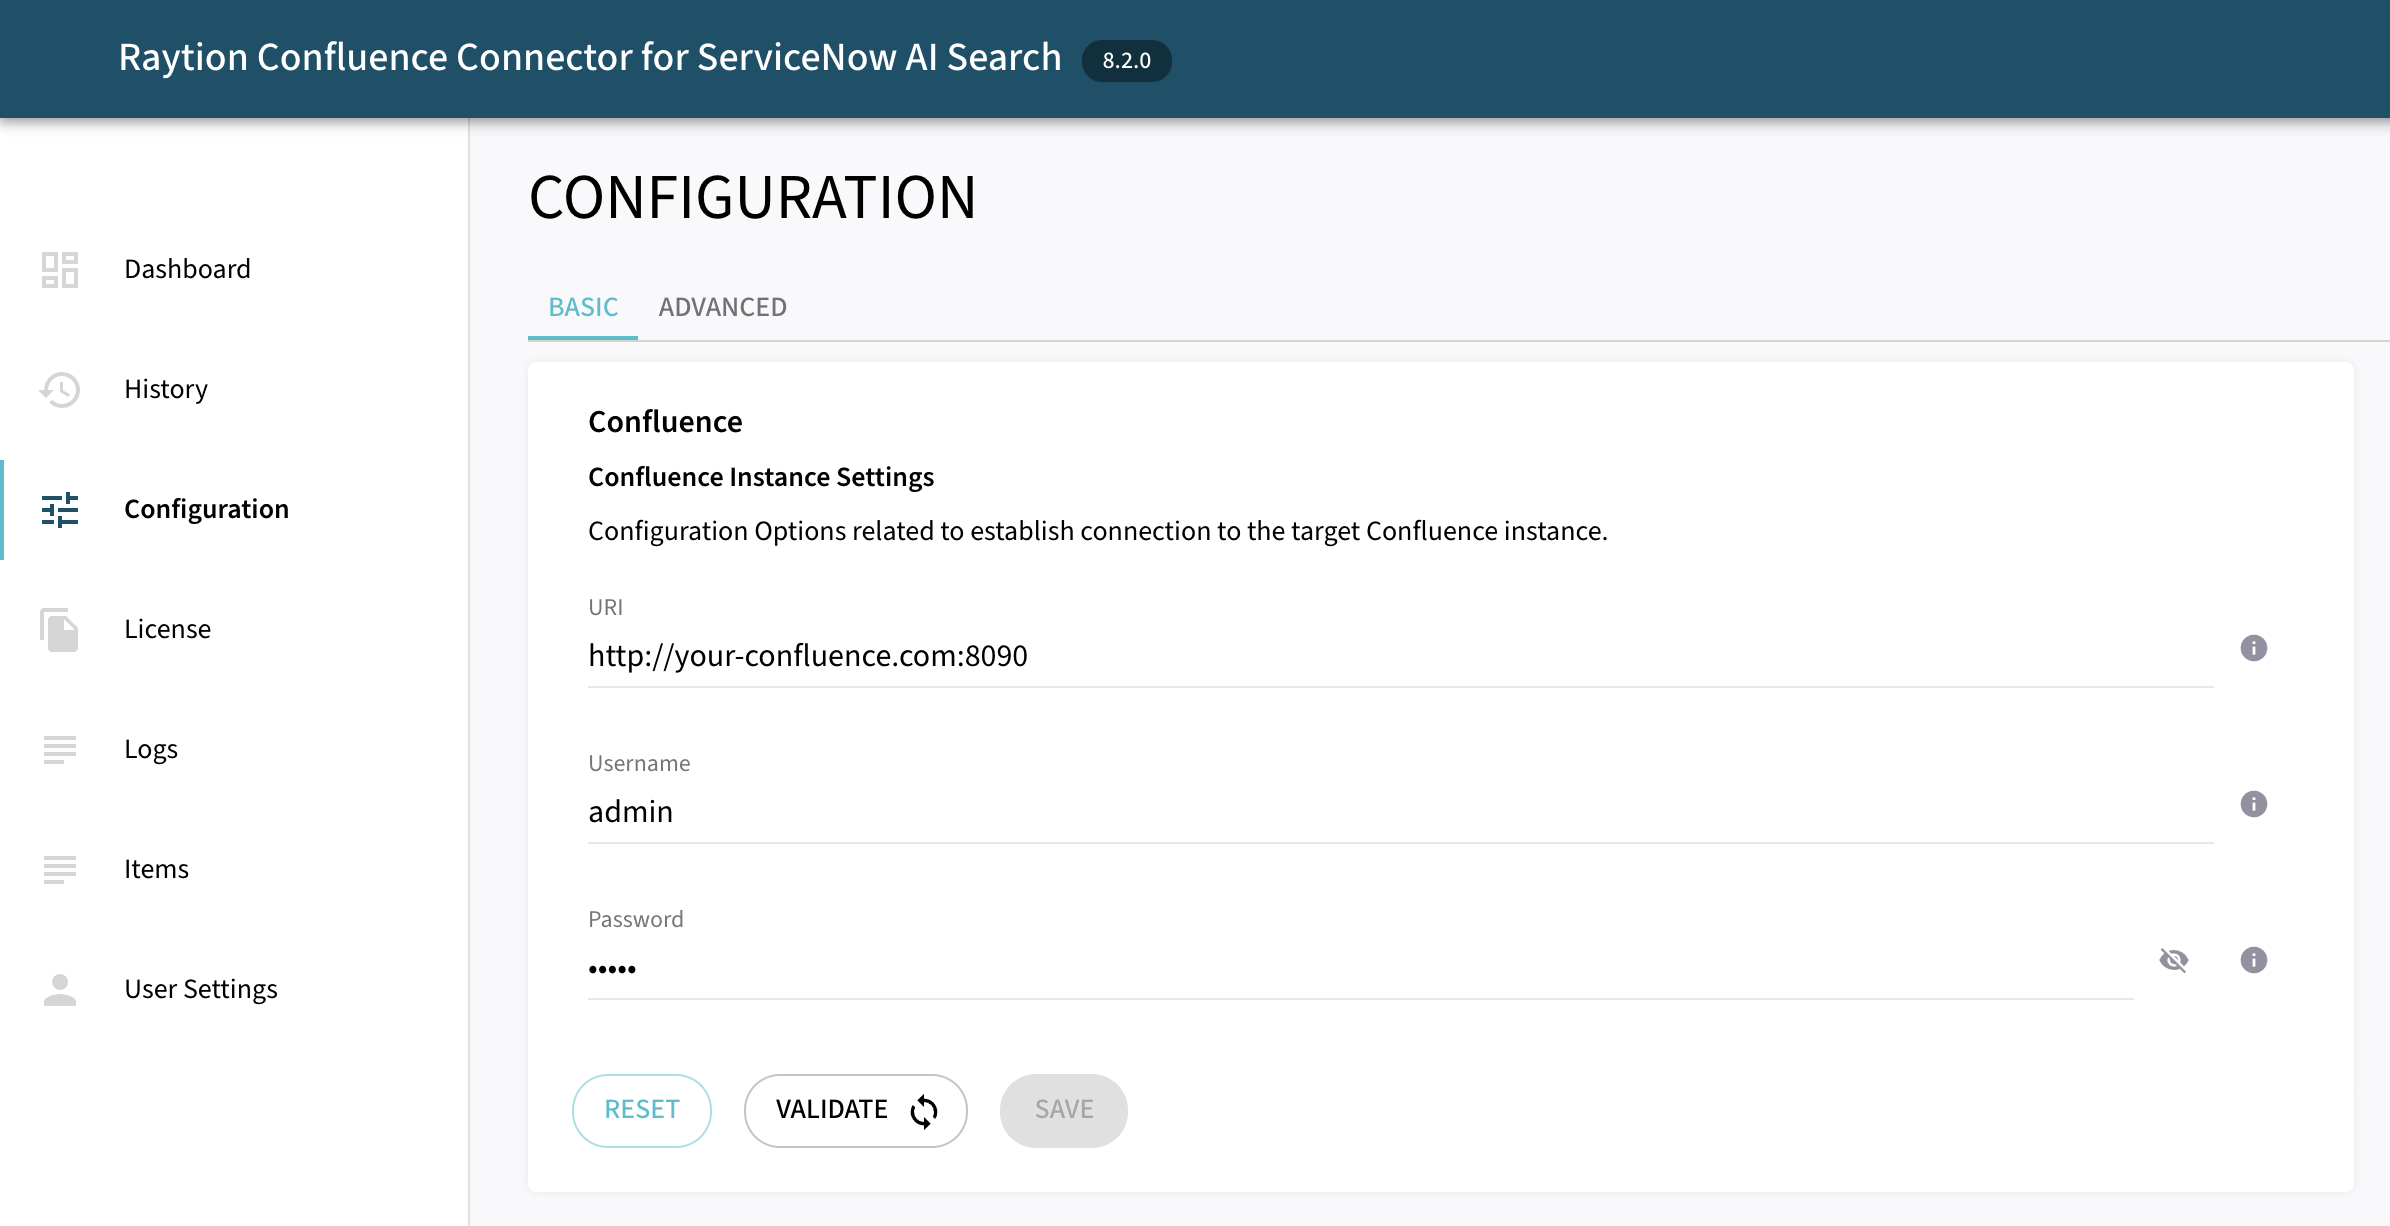
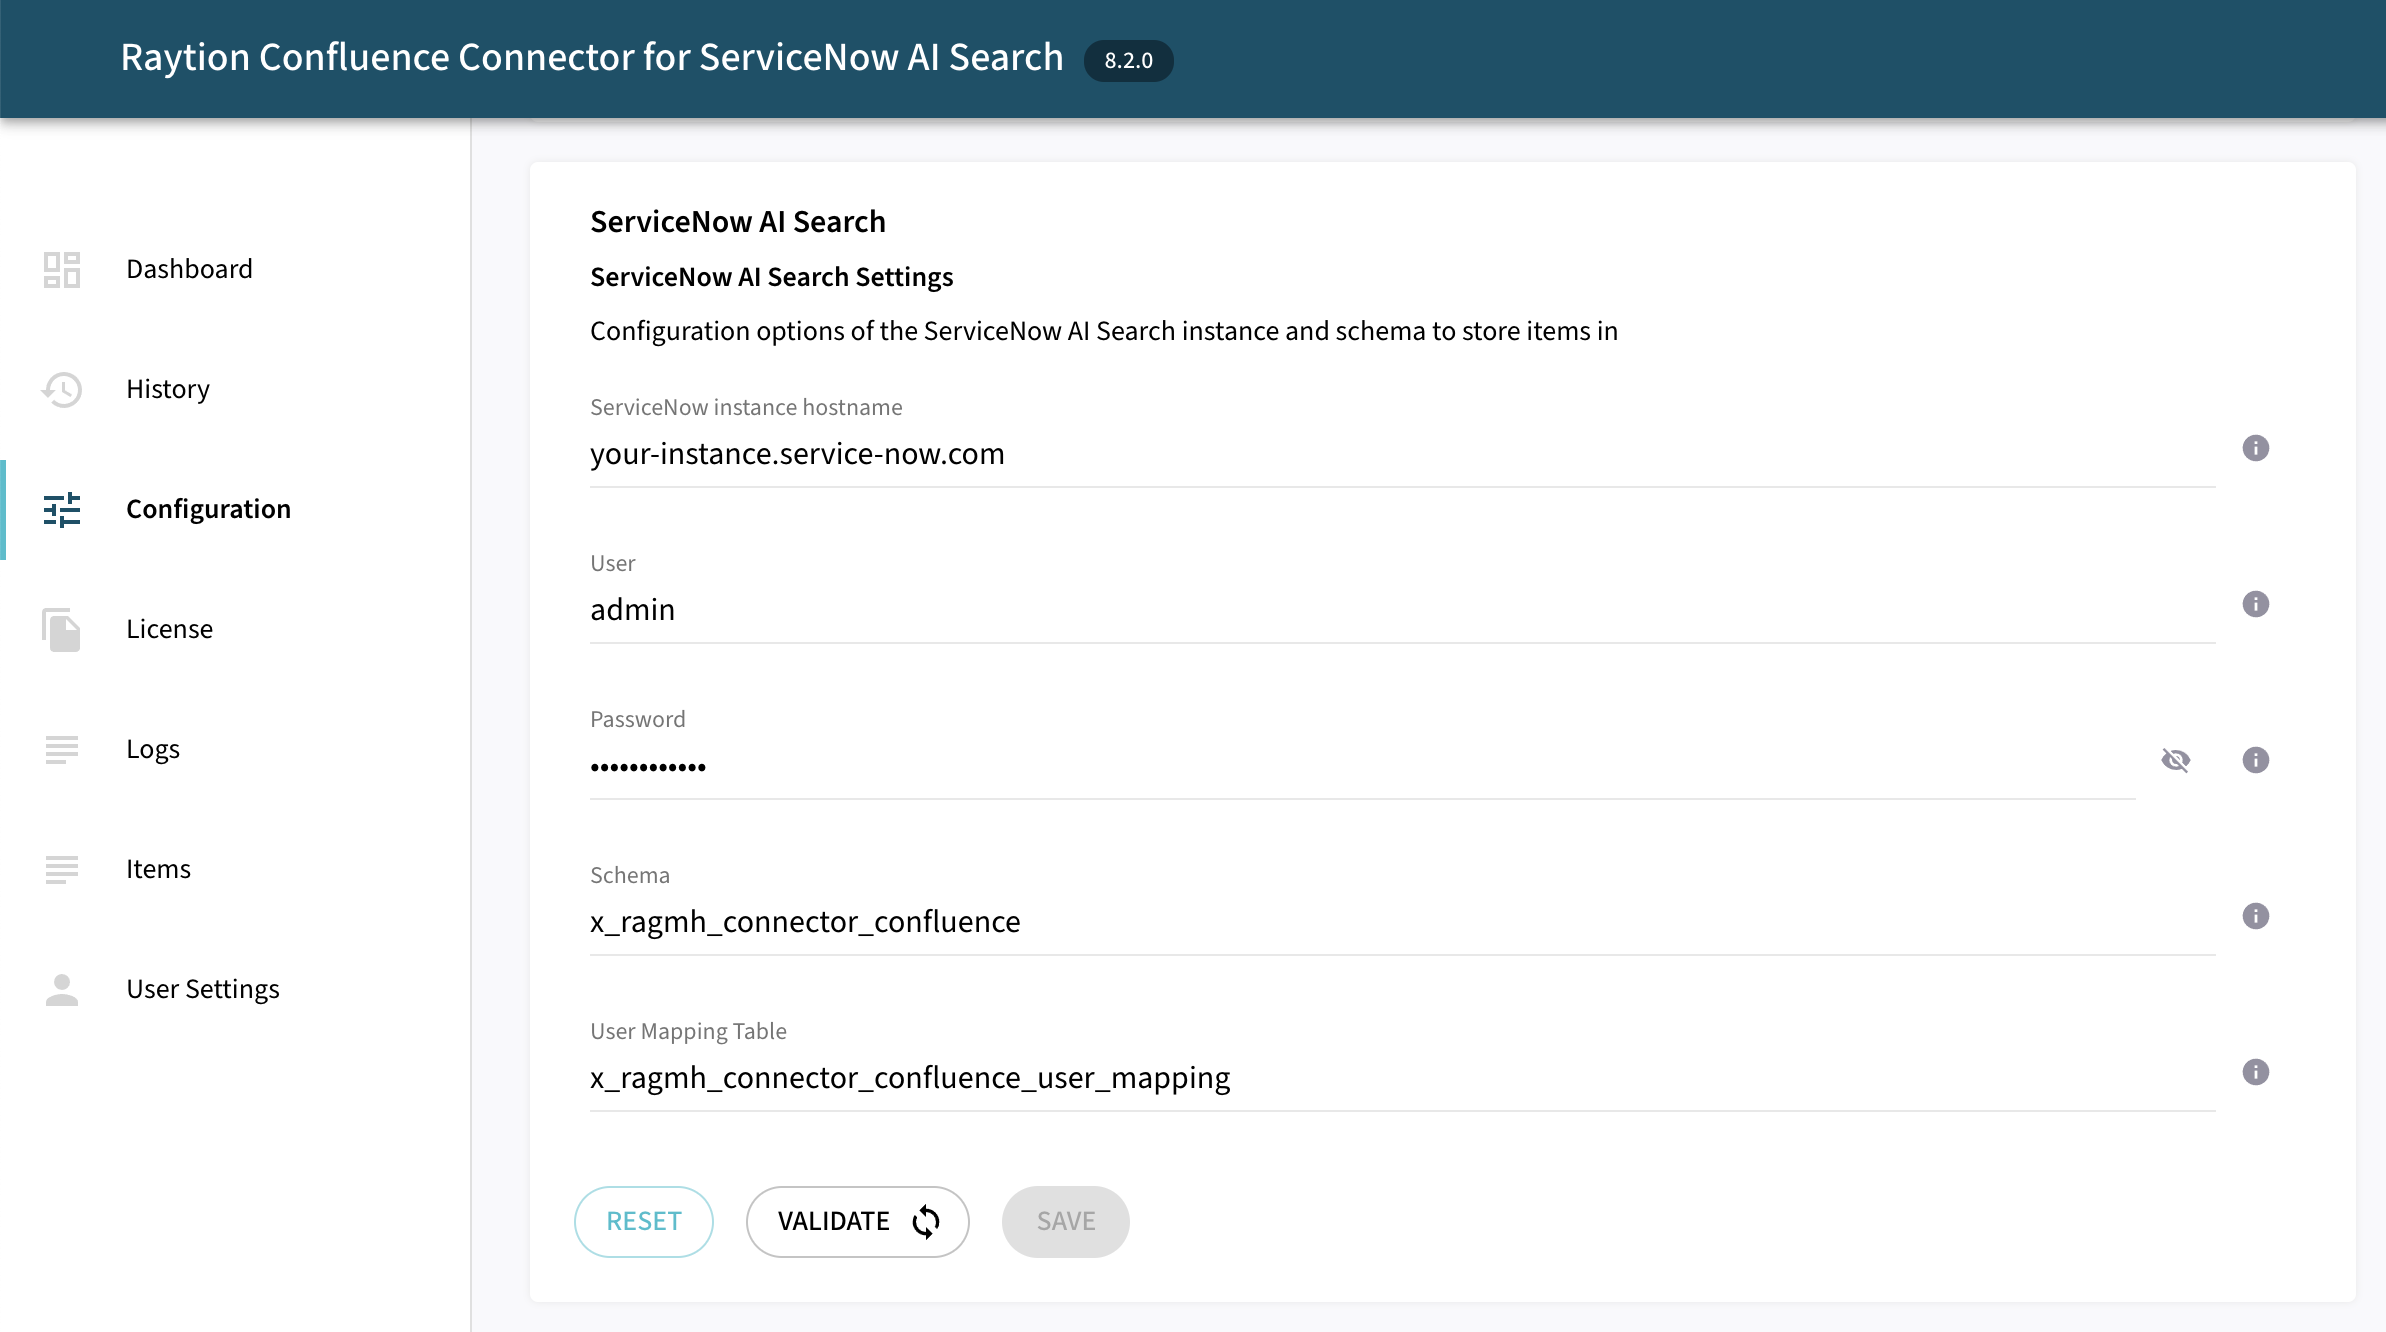
Configure Connector
Follow the description and instruction in the Basic Configuration Menu to configure the mandatory settings.
Principal Alias Configuration
If the usernames in Confluence does not match the username for ServiceNow users, enable the custom aliaser to configure an user mapping. In case the username of all Confluence users matches the username of ServiceNow users, you can skip the setp.
Navigate to Configuration → Advanced → Principal Aliaser and enable the option Custom Aliaser.
In the screenshot below, a static user mapping is added which will map the Confluence user confluence-admin to ServiceNow user admin.
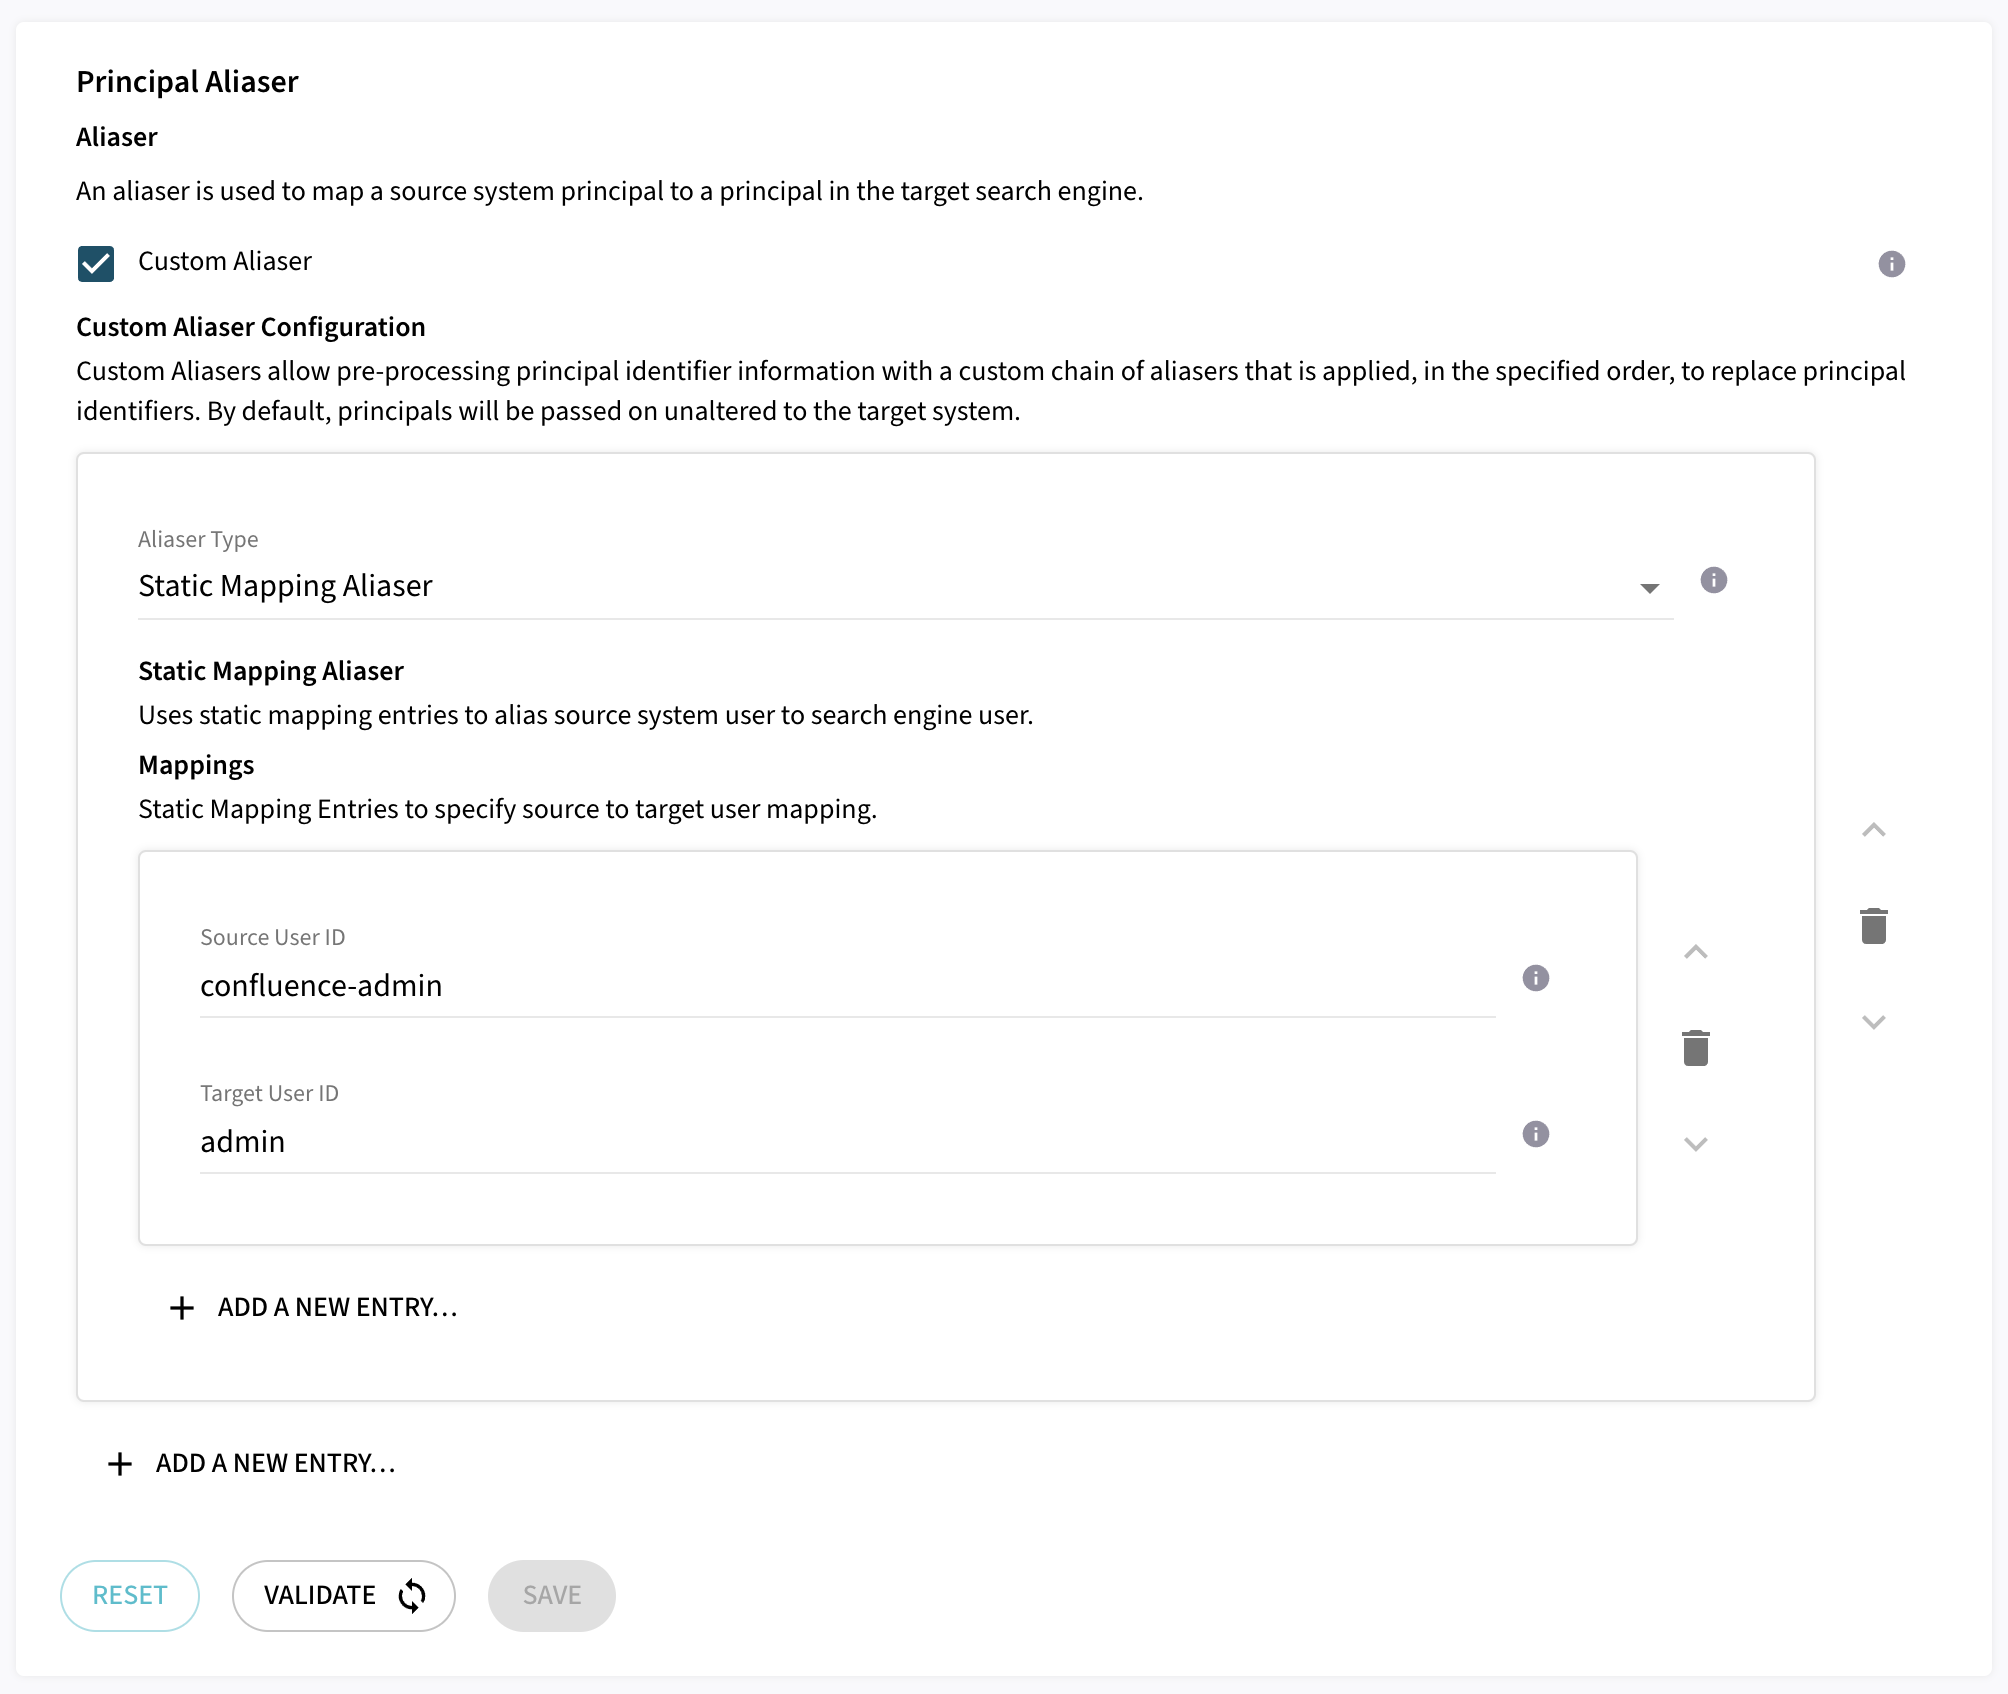
The Static Mapping Aliaser is the easiest way to configure an alias for a restricted number of users in the system.
If you have a larger system with many users, it is recommended to avoid the static mapping which requires an entry for all users in the system.
Instead, use one of the other complex aliasers listed in Principal Alias Configuration.
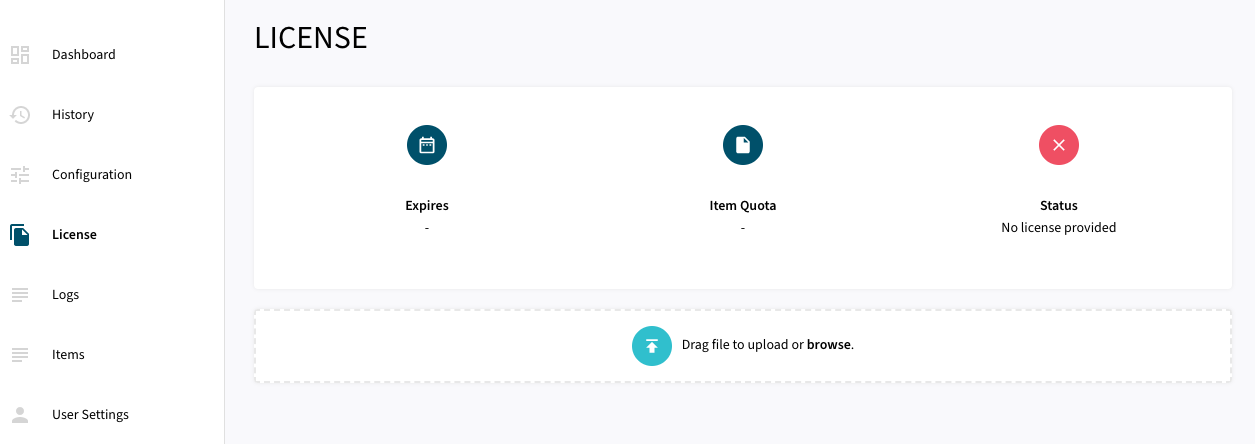
Upload License
-
Contact Raytion and obtain a license for your connector
-
Login to the Admin UI
-
Select License in the menu:
-
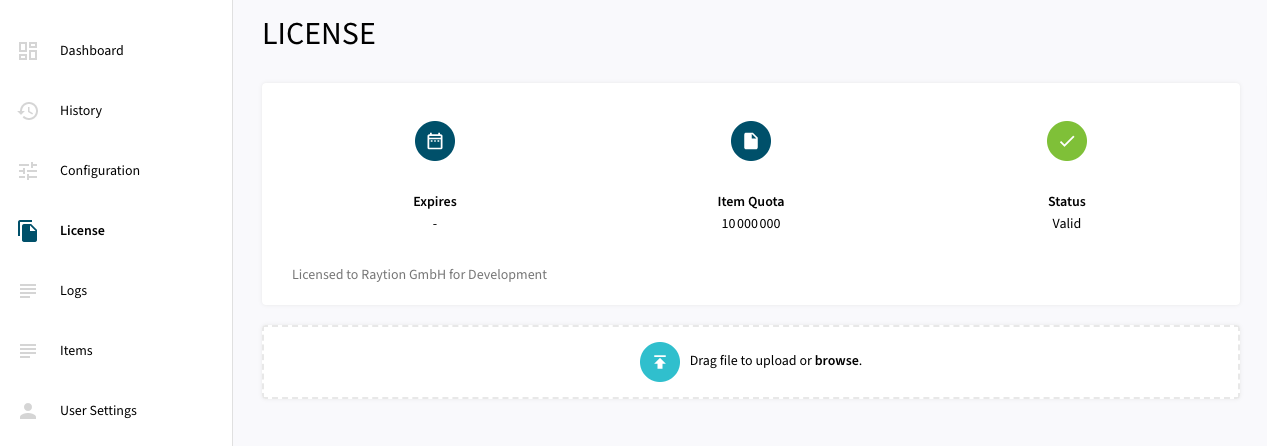
Upload the license file by browsing for the file or simply dragging a dropping the license onto the license page
-
The Status of the license will be displayed as valid, and the expiration and item quota will also be displayed:
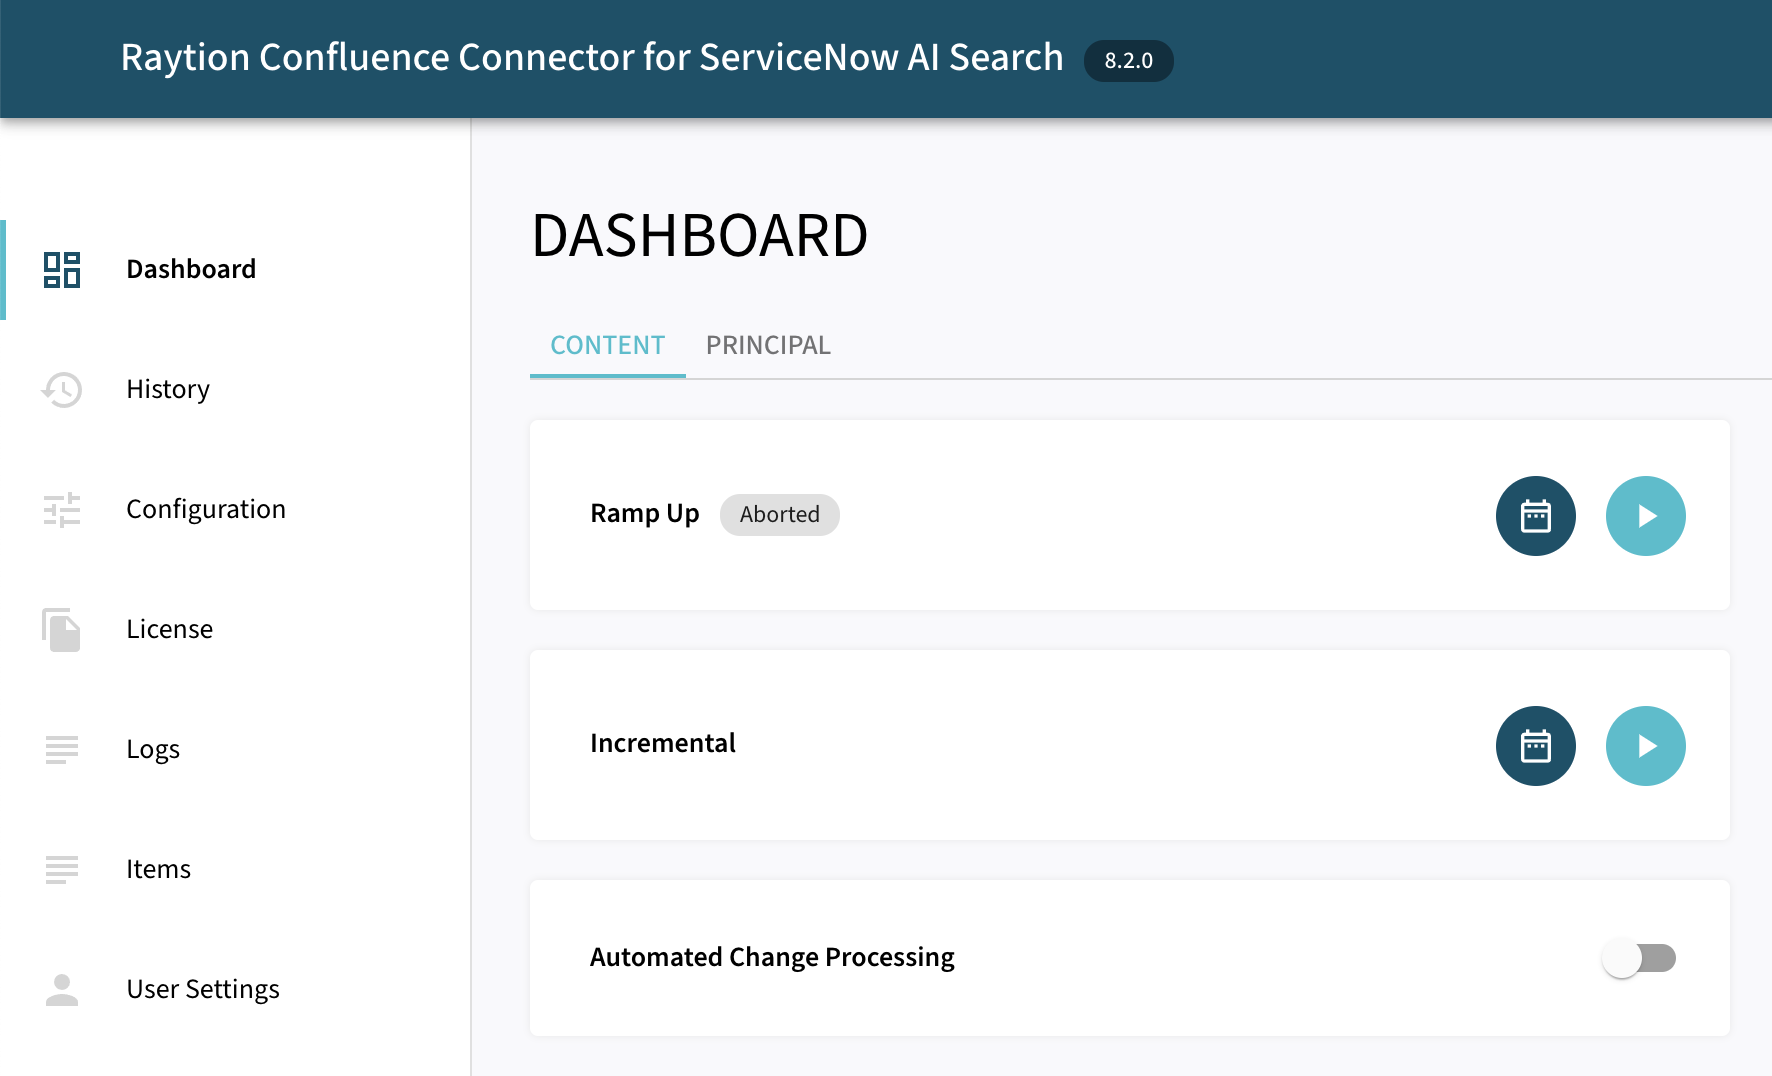
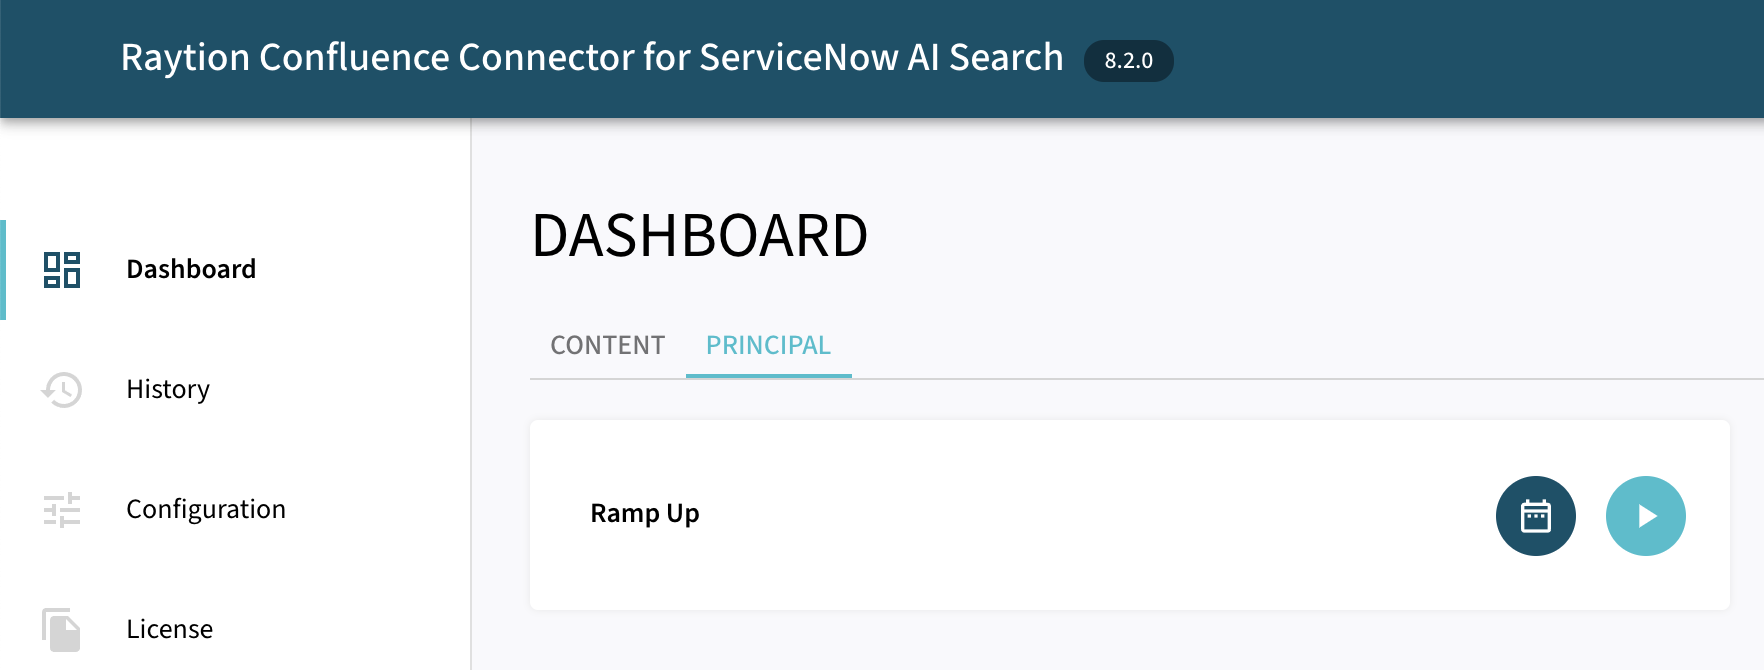
Synchronizing Content and Principal Information
Once, the connector is configured and license uploaded, you can start synchronize content and principal information using the traversal feature in the dashboard.